Gas Ignition Failures and Lockouts
Gas oven ignition failures account for about 35% of the service calls I run in Los Angeles. The symptom is simple: you turn the knob, hear clicking or see a glow, then nothing. The oven locks out after three failed attempts.
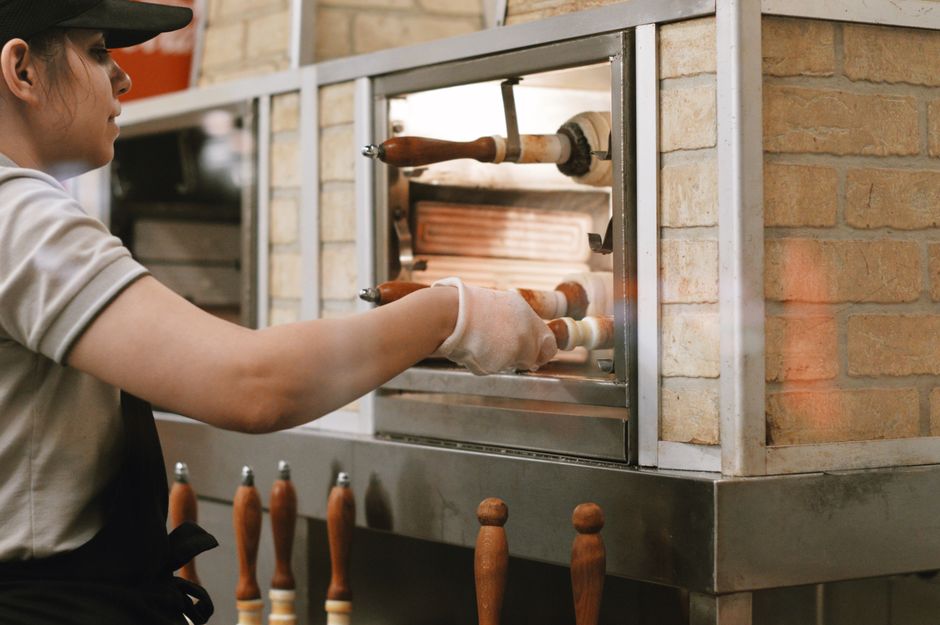
Start with the basics. On Southbend and Garland ranges, pull the bottom panel and watch the ignition sequence with the lights off. You should see the hot surface igniter (HSI) glow orange-white for 30-45 seconds, then hear the gas valve click open. If the HSI glows dim yellow or takes longer than 60 seconds, it's drawing insufficient amperage. The Blodgett 1048 single deck uses a Norton 271 HSI rated at 3.3 amps. When these drop below 2.8 amps, the valve won't open. Replacement takes 15 minutes and costs $85-120 for the part.
If the igniter glows properly but no gas flows, check your supply pressure first. I've found regulator creep on conversions from natural gas to LP, especially in older buildings around downtown LA. Inlet pressure should be 5-7 inches water column for natural gas, 10-14 for LP. Anything outside that range causes intermittent lockouts.
The gas valve itself fails less often than techs think. Vulcan and Wolf ovens use Honeywell VR8 series valves. True electrical failure is rare, but the small orifice screen inside clogs with pipe debris during new construction or replumbing work. I saw this on four units at a hotel renovation in Pasadena last year. You can remove the inlet filter screen, clean it, and reinstall in ten minutes without replacing the entire valve assembly.
If you're getting intermittent ignition only during peak service hours, you likely have a voltage drop issue on a shared circuit. This needs a licensed tech with metering equipment to trace. Call Superior Service at (714) 598-2370 before you lose another dinner rush.
Temperature Swing and Calibration Issues
Temperature swings larger than 25°F indicate a control problem, not normal cycling. I see this most often on convection ovens running 10+ years. The chef sets 350°F, the display reads 350°F, but product comes out under-baked on one load and scorched on the next.
First, verify actual cavity temperature with a calibrated reference thermometer. I carry a Fluke 52-2 with a Type K probe rated to 1000°F. Place it center rack, close the door, let the oven run through three complete cycles. Log the high and low points. Acceptable swing is 15°F on deck ovens, 20°F on convection, 25°F on older mechanical thermostat units.
If your reference thermometer shows 375°F when the display reads 350°F, you have either a failed thermocouple or a controller calibration drift. On Hobart and Blodgett models from 2008-2015, the Type J thermocouple (part number varies by model, typically around $45-65) develops junction fatigue. The metal oxidizes where the dissimilar metals meet, creating resistance that skews the millivolt reading. Replacement requires basic hand tools and takes about 20 minutes if you've done it before.
Controller calibration is trickier. Older analog controls have a small potentiometer under the knob shaft. You can adjust this yourself, but digital controllers like the Rational CPC or Blodgett CNVX require entering service mode. On the Rational SCC models, press and hold the settings button for 8 seconds, enter code 9999, navigate to sensor calibration. If you're not comfortable in these menus, don't experiment during service hours. I've seen chefs lock themselves out of proprietary systems, requiring a full board reset and recalibration that costs $350-500 in labor.
Overshooting temperature by 75°F or more points to a failed contactor sticking closed. The oven can't shut off the heating elements when temperature is reached. On Vulcan VC series convection ovens, the contactor is mounted to the right interior panel. You'll hear it buzz or see contact pitting when you pull the cover. These run $90-140 and require 208V or 240V lockout during replacement.
Convection Fan Motor Diagnostics
Convection fan failure changes your oven into an overpriced deck oven. No airflow means uneven baking, extended cook times, and angry pastry chefs. The motor itself is usually fine. The failure is in the capacitor, the relay, or the wiring harness that runs through 500°F ambient temperature.
Listen first. A healthy convection motor on a Southbend or Garland unit runs smooth with a low hum. Grinding, squealing, or rhythmic clicking means bad bearings. Bearings fail from grease breakdown, usually after 8-12 years of daily use. You can sometimes extend life another six months with high-temp bearing grease applied through the grease fitting, if your model has one. Most techs don't bother, they just replace the motor. A Fasco or Middleby motor for a standard convection oven runs $280-420, takes about 90 minutes to swap including cooling time and electrical disconnect.
If the motor is silent when the oven calls for convection, check the start capacitor. These are usually mounted near the motor or on the control panel. They're cylindrical, about the size of a shot glass, rated between 3-10 microfarads depending on motor size. Use a multimeter with capacitance function to test. A failed capacitor reads zero or significantly below rating. Replacement is straightforward but you must discharge the capacitor before touching terminals. I've seen guys knocked off ladders by residual charge on what they thought was a dead cap.
On newer ovens with solid-state controls, the fan relay on the controller board fails before the motor does. This is common on Blodgett Zephaire and Alto-Shaam combis built between 2012-2018. The relay contacts carbonize from inductive load cycling. You'll see the control board energize other functions but the fan stays dead. Board-level repair is possible if you can source the relay (typically an Omron or Finder series), desolder the old one, and install the new. Expect to pay $450-650 for a new OEM controller board if you're not comfortable with soldering iron work on a $6,000 oven.
Decoding Common Error Codes by Manufacturer
Modern commercial ovens throw error codes like a diesel engine. Here's what the common ones actually mean, based on the service manuals I keep in the truck and fifteen years of digital diagnostics.
Rational SelfCookingCenter: Code E.10 indicates core probe failure. The thin metal probe that monitors internal product temperature has shorted or opened. Part number 40.00.665 for most SCC models, around $180. Code 128 means water inlet failure on combi mode. Check the solenoid valve and inlet screen before replacing electronics. Code F.04 is high-limit lockout, usually from a failed relay or shorted heating element.
Blodgett CNVX and Zephaire: Code tSen or PROB means thermocouple out of range. Could be a bad sensor or a wiring short in the harness. Code HI LT is high-limit trip. Reset by powering down for 60 seconds. If it trips again immediately, you have a runaway heating element or a failed high-limit switch. Don't keep resetting this. It's a safety device for a reason.
Vulcan VC andVC-E Series: These use a simpler LED blink code system. Three blinks, pause, repeat indicates ignition lockout on gas models. Five blinks points to a convection fan interlock. The door switch or fan proving switch isn't closing the circuit. Check the micro-switch on the door latch before ordering parts.
Southbend Marathon and BGS: Digital displays show Er-1 for open sensor, Er-2 for shorted sensor, Er-3 for controller internal fault. An Er-3 usually means board replacement. I've tried reflowing solder joints on these Honeywell controllers with maybe 20% success rate. Not worth the gamble during busy season.
Persistent error codes that return immediately after clearing indicate a hard failure, not a glitch. If you're seeing the same code three times in one shift, schedule a service call. Continuing to reset and run risks collateral damage to expensive components.
Controller Board vs Sensor Failures: Diagnostic Logic
This is where I see the most misdiagnosis, even from techs with decent experience. A temperature error code doesn't automatically mean a bad thermocouple. A fan error doesn't always mean a bad motor. You have to think in terms of the control loop: sensor, wiring, controller input, controller logic, controller output, load device.
Start at the sensor. Disconnect the thermocouple or RTD from the controller. Measure resistance across the sensor leads with the oven cold. A Type K thermocouple should read very low resistance, under 5 ohms for a good unit. An open sensor reads infinite. A reading between 20-500 ohms indicates partial failure, corroded junction, or moisture infiltration. For RTD sensors common in European equipment, you should see around 100-120 ohms at room temperature for a PT100 sensor, scaling up predictably with heat.
If the sensor reads correct, check continuity through the wiring harness. I've found more wiring failures than sensor failures on ovens older than 12 years. The wire runs behind panels, near heating elements, through flexing door hinges. Insulation cracks, conductors oxidize, terminal crimps loosen from vibration. A visual inspection catches maybe half of these. You need to ring out each conductor from sensor to board with everything disconnected.
If sensor and wiring check good, the fault is in the controller. Before you order a $600 board, verify the power supply rails. Most commercial oven controllers run on 24VAC or 12VDC derived from an onboard transformer. Use your meter to confirm voltage at the board input terminals. I found a Blodgett last month in Burbank throwing random codes because a mouse had chewed through the 24VAC transformer secondary. The board was fine. The $40 transformer was toast.
When you do need to replace a controller board, take photos before you disconnect anything. These boards have 15-30 terminals, and the wiring diagrams in the oven don't always match the actual production run. I label every wire with tape and a Sharpie, even on a simple job. Saves an hour of tracing when you're reassembling at 11 PM because the chef needs the oven for tomorrow's prep.
When to Call Commercial Oven Repair in Los Angeles
Some fixes are straightforward enough for a capable facilities guy or a chef who's handy with tools. Cleaning an igniter, replacing a door gasket, swapping a clearly failed capacitor. These don't require EPA certification, gas licensing, or specialized diagnostic tools.
Other repairs cross into territory where mistakes get expensive or dangerous. Anything involving gas pressure adjustment, refrigeration systems on combi ovens, high-voltage wiring above 120V, or proprietary control systems with software updates requires professional service. The liability alone isn't worth the savings.
Call a commercial oven repair service when you encounter these situations:
- Gas smell during operation or after shutdown. Don't troubleshoot this yourself. Evacuate and call.
- Repeated high-limit trips that reset but return within the same shift. Something is failing toward a runaway condition.
- Error codes that aren't documented in your operator manual or require manufacturer software to clear.
- Any electrical fault where you see charring, melted insulation, or burned components. The visible damage is rarely the only damage.
- Combi oven water system faults, especially on Rational or Convotherm units with descaling errors. The pump and valve calibration requires factory procedures.
- Complete loss of function with no lights, no display, no response. Could be as simple as a tripped breaker or as complicated as a failed main board with cascade damage.
In Los Angeles County, commercial kitchen equipment repairs often require permitted work, especially if you're modifying gas lines or electrical service. A licensed contractor like Superior Service carries the insurance, bonding, and certifications that protect you during health inspections and insurance claims. We've been doing this since 1980, which means we've seen your exact oven model fail in your exact way at least a dozen times before.
Response time matters in commercial kitchens. A down oven during prep costs more per hour than the service call. Our trucks stock common parts for Blodgett, Southbend, Vulcan, Garland, Rational, and other major brands. We're not showing up to diagnose, leave to order parts, then come back three days later. Most repairs finish same-visit.
Los Angeles Commercial Oven Repair Costs and Timelines
Repair costs in Los Angeles run higher than national averages due to labor rates, travel time in traffic, and California-specific licensing requirements. Here's what you should expect to pay for common repairs in 2025, based on our actual invoicing data:
| Repair Type | Parts Cost | Labor Cost | Total Range | Time Required |
|---|---|---|---|---|
| Igniter replacement (gas oven) | $85-$120 | $150-$220 | $235-$340 | 45-90 min |
| Thermocouple/sensor replacement | $45-$180 | $140-$200 | $185-$380 | 30-75 min |
| Convection fan motor | $280-$420 | $200-$320 | $480-$740 | 90-150 min |
| Gas valve replacement | $210-$380 | $220-$340 | $430-$720 | 90-180 min |
| Controller board replacement | $380-$850 | $180-$280 | $560-$1,130 | 60-120 min |
| Door hinge and spring set | $120-$240 | $160-$240 | $280-$480 | 60-90 min |
| Heating element (electric oven) | $140-$320 | $180-$260 | $320-$580 | 75-120 min |
These numbers assume standard access and no hidden damage found during disassembly. If we find a melted wiring harness behind a failed contactor, that's additional parts and labor. If your oven is built into a tight millwork enclosure and we have to pull the entire unit to access the back panel, add time.
Emergency service calls after hours or weekends carry premium rates, usually 1.5x to 2x standard labor. If your oven dies at 6 PM on a Saturday and you need it for Sunday brunch, expect to pay for that urgency. Plan preventive maintenance during slow periods to avoid this.
Timelines for parts that aren't on the truck: common Blodgett, Southbend, and Vulcan components ship from distributors in City of Industry or Anaheim, usually next-day. Rational and European brands sometimes require air freight from regional warehouses, 2-5 days. Obsolete parts for ovens older than 15 years can take weeks or may not be available at all, forcing a retrofit or replacement decision.
Most commercial ovens hit major repair or replace decision points at 12-15 years. When you're looking at a $2,000 repair on a 14-year-old deck oven, consider that you're likely facing another $1,500-3,000 in repairs over the next 24 months. New equipment with warranty and better efficiency sometimes pencils out better than continued life support on old iron.
For diagnostic help or to schedule commercial oven repair service in Los Angeles, call Superior Service at (714) 598-2370. We'll talk through your symptoms on the phone and let you know if it's something you can handle or if you need a truck rolled. No point in paying a service call for something you can fix with a YouTube video and a screwdriver.